Are you a word power user? Then these are just some tips, hacks you should know. From page breaks microsoft word to section and column breaks there are numerous ways to make a document look appealing. And handling complex functions on these documents also becomes easy once you understand how to have page breaks in word. So, let’s get going and understand how to create professional looking documents.
Did you know that Microsoft Word(MS Word) has numerous features that help to organize the documents in whatever way you want to? Page breaks and section breaks in word is one such method used to customize the document. In this article, we will cover what each type of break is, when we would use them and some useful examples on how to use them in our daily work. .
Let’s start with page breaks here!
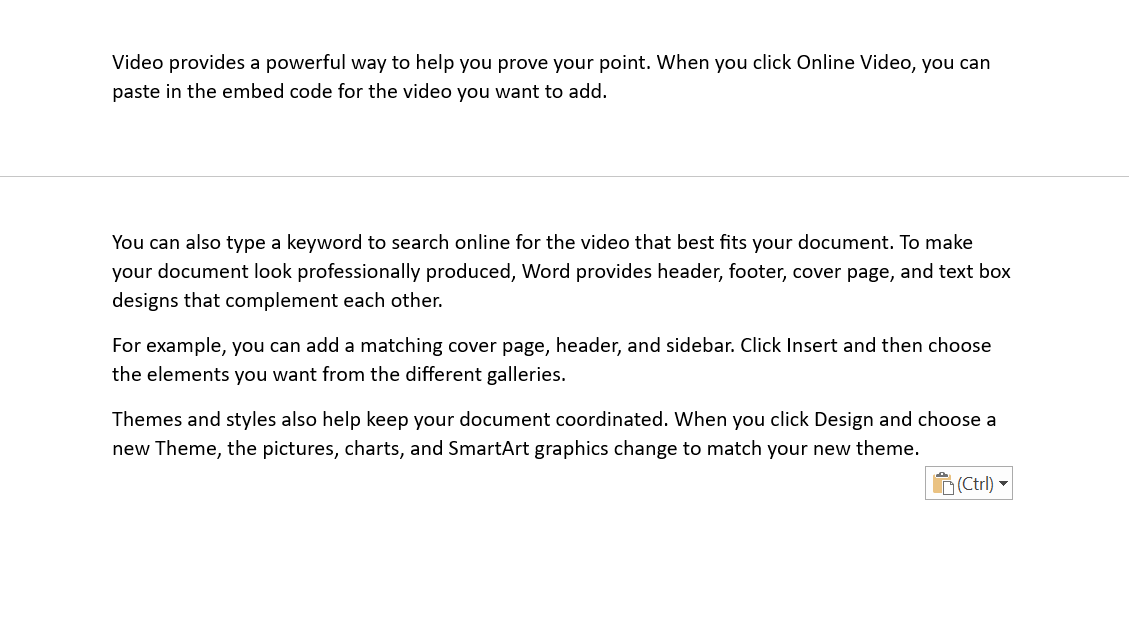
What is a word document not showing page breaks? If we were to talk in a layman’s term, a page break is like a pause button for your document as it allows you to take a break from the writing, without having to actually pause the writing process. It's like having a 'Do Not Disturb' sign on your document, so you can take a breather without anyone seeing your unfinished masterpiece. So, if you ever need to take a break from your writing, just hit the page break button and you can relax without worrying about anyone seeing your half-finished work!
Let us see how page breaks work in word. Page breaks come in handy for formatting documents with multiple pages, such as reports or books.
In Windows OS, if you want to hit a Page Break, here is what to do:
- Put your cursor where you want one page to end and the next to begin.
- Go to Insert > Page Break.

For macOS, to insert a manual page break:
- Click or tap in the document where you want to insert a page break.
- Go to Layout > Breaks > Page.
Now, as you understand there is the keyboard method and the mouse method to do the page break. One of the keyboard shortcuts is
Ctrl +Enter = page break.
Result is section 1 remains along with page 2 of 2 showing up. To do an undo is Ctrl z.
When do you go for the section break?
We did discuss taking the writing from good to great and using a section break is part of it. Section breaks can be used to divide and format documents of all sizes. By breaking sections into chapters, you can add formatting such as columns, headers and footers, and page borders.
Let’s see how to get a section break on Windows OS:
- Select where you want a new section to begin.
- Go to Layout > Breaks.

And in macOS, to get a section break:
- Select where you want a new section to begin.
- Go to Layout > Breaks, and then choose the type of section break you want.
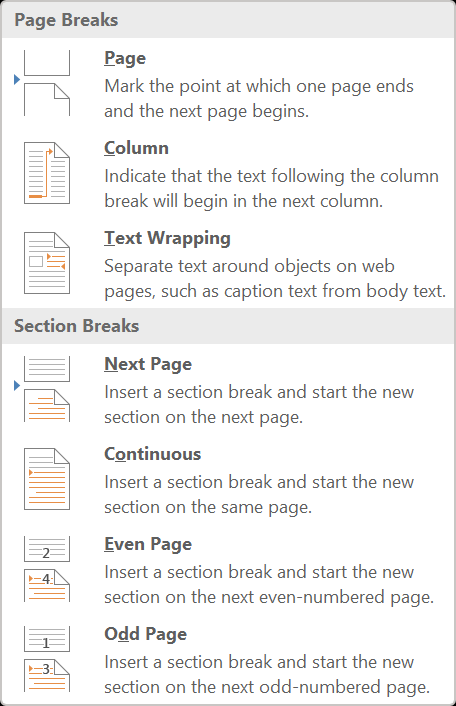
In your document, section breaks can be used to change the layout or formatting. You can insert a section break at the beginning of where you want the change, to modify the formatting in a document. You just need to set up the formatting change just past the new section break. If you want to change formatting again, put in another section break. If your changes are to be on the same page, choose the Continuous section break. Otherwise, choose Next Page, Odd Page, or Even Page section breaks. If the formatting change occurs in the previous section, press Ctrl or Command + Z and move your cursor to after the section break and try it again.

Here are some of the section breaks you may want to add:
- A 'Next Page' section break starts a new section
- A continuous section break initiates the next section
- In either an Even Page or Odd Page section break, the next even- or odd-numbered page will begin the new section.
Learn when to use a section break over a page break:
You have two pages, both portraits. Now, you need the third page in the document to be in landscape mode. Page break is of no use here. So, here go to layout, breaks- section break next page, here you can see you got section 1 in the bottom left and you have what looks like a page break, so let’s name it page 3. You can see Page 1 and 2 are in portrait mode. Now, as you did a section break instead of a page break, you can go under page setup orientation of the word document and you can make this section landscape.
Now, let’s get on with column break
Have you been wondering what you need them for? Well, have you seen those colorful and interesting newsletters that slide into your email inboxes? Most are promotion / marketing info from businesses. Apart from that, have you really looked at the structure or layout of a newsletter? See this sample college newsletter template below:

See, that this document contains columns. So, like the newsletter to create a document with columns, you will need to insert a column break. To insert the column breaks,
- Place your cursor where you want the column to break.
- Click Layout > Breaks
- In Word 2013 or Word 2010, click Page Layout > Breaks.
- A menu with options will appear. Click Column.
- A column break is inserted. Click Home > Show/Hide
Now for the keyboard shortcut. You can use Ctrl+Shift+Enter. This inserts a column break where you’ve placed your cursor. When you use column breaks, text flows automatically from one column to the next. You may find the need to end the text in one column and start it again in the next column. To get this, you insert a column break.
Conclusion
If you are working on long documents, then the section and page breaks will save you from many headaches. You have seen here an example of how a section or column break works or how page breaks work in word. Using Microsoft Word for your writing can be a great way to get organized and create professional-looking documents. One of the features that make Word so versatile is its ability to break up pages, sections and columns with ease. To make it easier for you to master all these hacks, keySkillset launches its highly simulated hands-on training courses on MS Word.


.jpg)
.jpg)


.png)


.png)

